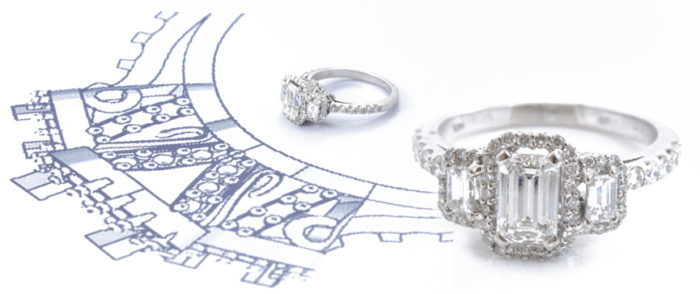
The Custom Jewelry Process
How Custom Jewelry Is Made
Creating custom jewelry involves much more than drawing a design and pouring metal into a mold. The proportions must work at the finished scale, the structure must support the gemstones, and every part must be practical to cast, assemble, polish, set, and wear.
Most of our custom projects begin as a three-dimensional CAD model. From there, the design is converted into a physical model, cast or fabricated in the selected metal, refined by hand, set with gemstones, finished, and inspected.
The exact manufacturing process depends on the piece. A detailed engagement ring may require different methods from a heavy men’s ring, a pendant, a pair of earrings, or a design made with several metals. The following sections explain how a typical custom jewelry design becomes a finished piece.
Turning an Idea Into a Workable Design
A project may begin with a photograph, sketch, existing piece of jewelry, loose gemstone, logo, symbol, or description of an idea. These references establish the general direction, but they do not contain all the information required to manufacture the jewelry.
Before the design is modeled, we consider the jewelry type, dimensions, metal, gemstones, ring size when applicable, setting style, desired weight, finish, and how the piece will be worn.
An image that looks attractive on a screen may contain details that are too small, thin, sharp, or unsupported to reproduce successfully in metal. Part of the design process is translating the idea into proportions that preserve its character while making it suitable for manufacturing and regular wear.
Creating the CAD Model
CAD stands for computer-aided design. Jewelry CAD software allows the piece to be constructed as a detailed three-dimensional model rather than a flat drawing.
The designer can control the width, thickness, curvature, stone placement, prong dimensions, openings, patterns, lettering, and other structural details. The model can be rotated and examined from every direction, making it possible to evaluate areas that may not be visible in a conventional front-view sketch.
CAD also allows the design to be created around the exact measurements of a diamond or gemstone. This is especially important when using an existing stone, an unusual shape, or several stones that must fit together in a particular arrangement.
The goal is not merely to produce an attractive image. The model must also account for scale, metal strength, casting tolerances, finishing, stone setting, comfort, and the limitations of the selected manufacturing method.
Reviewing the Design Renderings
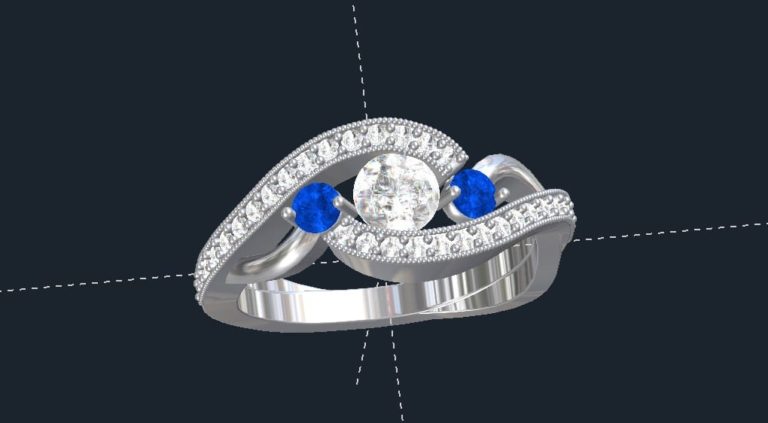
Once the CAD model has been developed, renderings are created to show the proposed jewelry from multiple angles. These images help you review the overall shape, proportions, stone arrangement, setting height, surface details, and relationship between the different parts of the design.
A rendering is a detailed representation of the proposed piece, but it is not a photograph of the finished jewelry. Metal color, reflections, gemstone appearance, and tiny details may look somewhat different after the piece has been cast, polished, and set.
The rendering stage is the best time to adjust the design. Changing the width of a band, repositioning a stone, altering a pattern, or changing the profile is generally more practical before production begins than after the piece has been manufactured.
Once the design is approved, the CAD file is prepared for the next stage of production.
Producing the Wax or Resin Model
For many cast pieces, the digital CAD model is used to produce a physical model in wax or castable resin. This is usually created with specialized 3D-printing or milling equipment capable of reproducing small jewelry details.
The physical model represents the shape of the jewelry before it becomes metal. It includes the primary structure, settings, openings, patterns, lettering, and other elements built into the CAD design.
The model is checked for obvious defects before casting. Supports left by the printing process may need to be removed, and certain surfaces may require preparation. Problems in the model can carry into the casting, so this stage is an important bridge between the digital design and the finished metal piece.
Some jewelry may instead be hand fabricated, machined, assembled from multiple components, or produced through a combination of methods. The manufacturing approach is selected according to the design rather than forcing every piece through exactly the same process.
Lost-Wax Casting
Lost-wax casting is a traditional manufacturing method that can be combined with modern CAD and 3D-printing technology..
The wax or resin model is attached to a channel called a sprue and placed inside a casting flask. A heat-resistant investment material is poured around it and allowed to harden. The flask is then heated so the wax or resin is removed, leaving an empty cavity in the exact shape of the jewelry.
Molten gold, platinum, silver, or another selected casting metal is introduced into that cavity. After the metal cools, the investment material is removed and the rough casting is revealed.
The term “lost wax” refers to the disappearance of the original model during the burnout process. The wax does not become part of the finished jewelry; it creates the space that the molten metal fills. CAD/CAM technology has modernized how these models are created, but the basic casting principle remains well established in jewelry manufacturing.
Removing and Cleaning the Casting
A newly cast piece does not emerge from the mold looking like finished jewelry. It may have sprues, rough surfaces, small remnants of investment material, and marks left by the manufacturing process.
The casting is separated from its sprue and carefully cleaned. Excess metal is removed, surfaces are filed and sanded, and inaccessible areas are refined with specialized tools.
The jeweler also checks for casting defects, incomplete areas, porosity, or distortion. Minor surface issues may be corrected during finishing, while a serious defect may require repair or recasting.
This stage requires restraint. Removing too much metal can alter the proportions, weaken a setting, or erase small details. The casting must be refined without changing the approved design.
Assembly, Soldering, and Laser Welding
Some custom pieces are cast as one unit, while others are produced in several components and assembled afterward.
A two-tone ring, hinged pendant, complex gallery, separate head and shank, or piece containing moving parts may require soldering or laser welding. Components must be aligned carefully so the finished piece remains symmetrical and the stones sit in the intended positions.
Laser welding can concentrate heat in a small area and is useful for certain detailed assembly and repair tasks. Traditional soldering remains appropriate for many other applications. The method depends on the metals, construction, gemstones, and location of the joint.
Any seams or connection points are refined so they appear intentional and do not interfere with comfort, strength, or the surrounding design.
Setting the Diamonds and Gemstones
Stone setting is the process of securing each diamond or gemstone in the metal. The appropriate method depends on the design, stone shape, dimensions, durability, and desired appearance.
Prong settings hold the stone at several points while leaving much of it visible. Bezels surround more of the edge with metal and create a smoother, more protective profile. Pavé and bead setting place small stones across the surface, while channel setting positions them between metal walls. Flush-set stones sit within the metal with very little projection above the surface.
A single custom piece may combine several setting methods. An engagement ring, for example, might use prongs for the center diamond, pavé along the band, and a small bezel-set stone hidden beneath the center setting.
The setter must balance security with appearance. The metal must hold the stones firmly without covering more of them than the design requires.
Engraving, Texture, Enamel, and Plating
After the primary manufacturing and setting stages, additional decorative finishes may be applied.
Engraving can add names, dates, handwriting, symbols, patterns, textures, or artwork. Depending on the design, it may be produced through CAD, laser engraved, or cut by hand.
Brushed, satin, hammered, sandblasted, antiqued, and other finishes alter the way the surface reflects light. Several finishes can be combined to emphasize raised and recessed portions of the design.
Enamel can introduce color into selected areas. The recesses, metal, enamel type, and firing or curing requirements must be considered during the original design because enamel cannot simply be added successfully to every surface after the jewelry has been completed.
Plating may be used to create a particular surface color or appearance. Because plating is a surface treatment rather than the underlying metal, exposed plated areas can change with wear and may eventually require renewal.
Final Polishing and Finishing
Polishing is not a single pass with one wheel. The jewelry is refined through a progression of abrasives and polishing compounds that remove manufacturing marks and produce the intended surface.
A highly polished finish creates strong reflection, while satin and brushed finishes require controlled, consistent texture. Recessed areas, interior surfaces, edges, prongs, and decorative details must all be addressed without rounding or erasing the design.
The order of operations matters. Certain areas are pre-polished before assembly or stone setting because they would be difficult to reach afterward. Other surfaces receive their final finish only after all construction and setting work is complete.
The piece is cleaned between stages to remove polishing compound, metal residue, and debris from beneath the stones and inside the settings.
From Digital Design to Finished Jewelry
The custom jewelry process combines modern design technology with traditional jewelry-making skills. CAD allows us to develop and review the structure before production, while casting, assembly, polishing, setting, engraving, and inspection turn the digital model into a finished piece.
Every project presents different manufacturing requirements. A simple solitaire, sculptural pendant, detailed signet ring, and stone-covered wedding band will not follow exactly the same path. The process is adjusted to suit the design, metal, gemstones, and intended use.
To learn about submitting your idea, receiving a quote, reviewing CAD renderings, approving revisions, payment, and shipping, visit our How It Works page. When you are ready to begin, send us your idea, reference images, preferred materials, and any gemstones you want incorporated.
You can learn more detail about the process here.